Getting Started with vSAN in vSphere 5.5
As you may or may not know VMware announced the new vSAN with vSphere 5.5. vSAN is currently in public beta but it is very easy to get started testing it out in your new vSphere 5.5 environment. First thing you should do is head over here and get signed up to get your license key which is required to use vSAN. All functionality is already built into vSphere 5.5 but you will need to enter a license key.
So to get you started I wanted to throw this post together so you can start testing vSAN out. There are a few things you must do in order to get vSAN running properly which I will go over in this post. Just an FYI, all vSAN options and functionality are only visible in the web ui so the traditional C# viclient will not work.
Now head over to your vCenter web ui using your browser of choice and let’s get started.
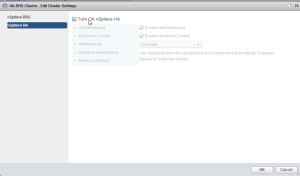
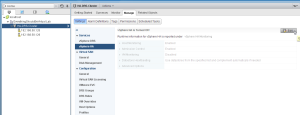
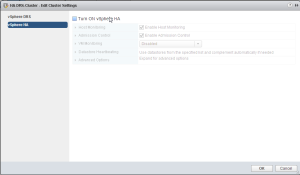
First thing you must do is head over to your HA settings for your cluster and disable HA. You will not be able to enable vSAN when HA is enabled and will get an error stating so.
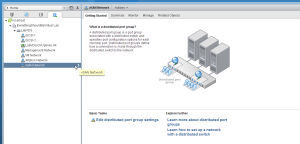
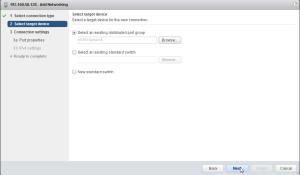
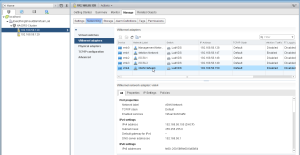
Next you will need to create a new VMKernel port for vSAN communications. After creating this port all HA communications within your cluster will function over this same VMKernel port once HA is enabled again.
I am using VDS (vSphere Distributed Switch) in my setup so these are what screenshots will represent this setup.
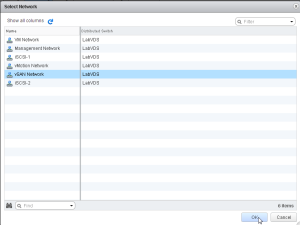
Create a new VDS Portgroup in my case it will be called vSAN Network.
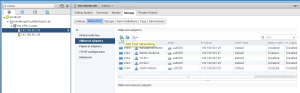
Now create new VMKernel ports for each of your hosts in your cluster using this new Portgroup.
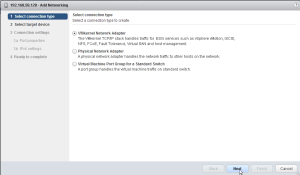
Select an existing distributed port group and choose the vSAN Network.
Make sure to select Virtual SAN Traffic.
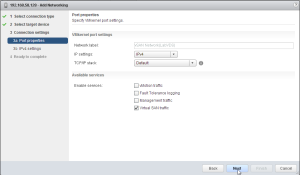
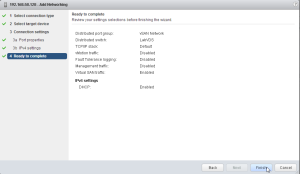
You will now see your new VMKernel port which is VMK4 in my case.
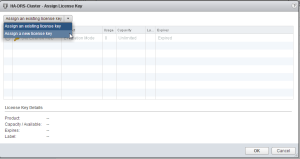
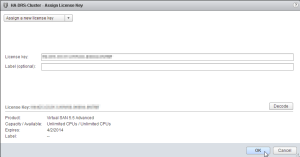
Now after doing this for each of your hosts in your cluster we will now enable vSAN. Make sure you have your license key handy as well for the next step.
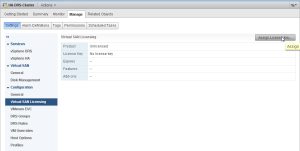
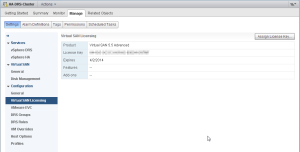
Browse to your cluster settings and add your license key for vSAN under Virtual SAN Licensing.
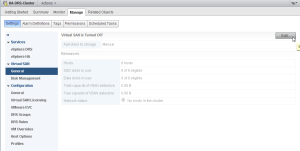
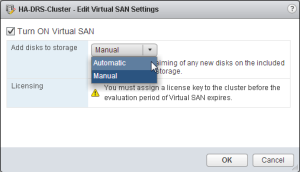
Now let’s enable vSAN.
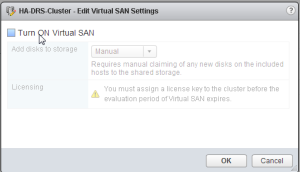
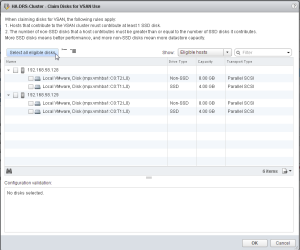
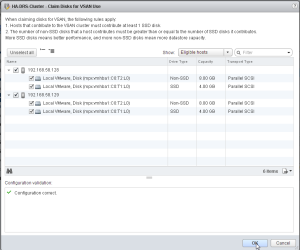
Select Auto or Manual for adding disks per host. I selected Automatic but went ahead and manually assigned at the end of this so you can see that as well.
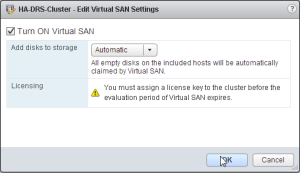
vSAN is now enabled for your cluster.
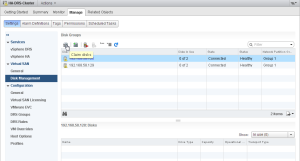
Now go to Disk Management and we will now claim the disks to be used in our vSAN setup.
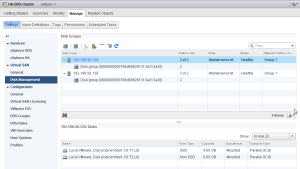
Now if you browse to your Datastores view you will now see a new Datastore called vsanDatastore.

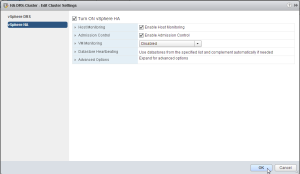
So now the last thing to do before using your new vSAN setup is to enable HA for your cluster seeing as we disabled it at the very beginning.
And there you have it. vSAN is up and running and has presented us with a new Datastore that you can start using just as any other Datastore. You can call also get into different VM Storage Policies as well once you start getting familiar with vSAN in order to set different policies for each scenario. If you need info on the new VM Storage Policies in vSphere 5.5 head over here.
Enjoy!
Comments